github 项目地址

在线预览


参考资料

手把手带你写 Vue 可视化拖拽页面编辑器

跨越浏览器的边界拖拽**,实现数据共享**

Canvas实现图片上标注、缩放、移动和保存历史状态

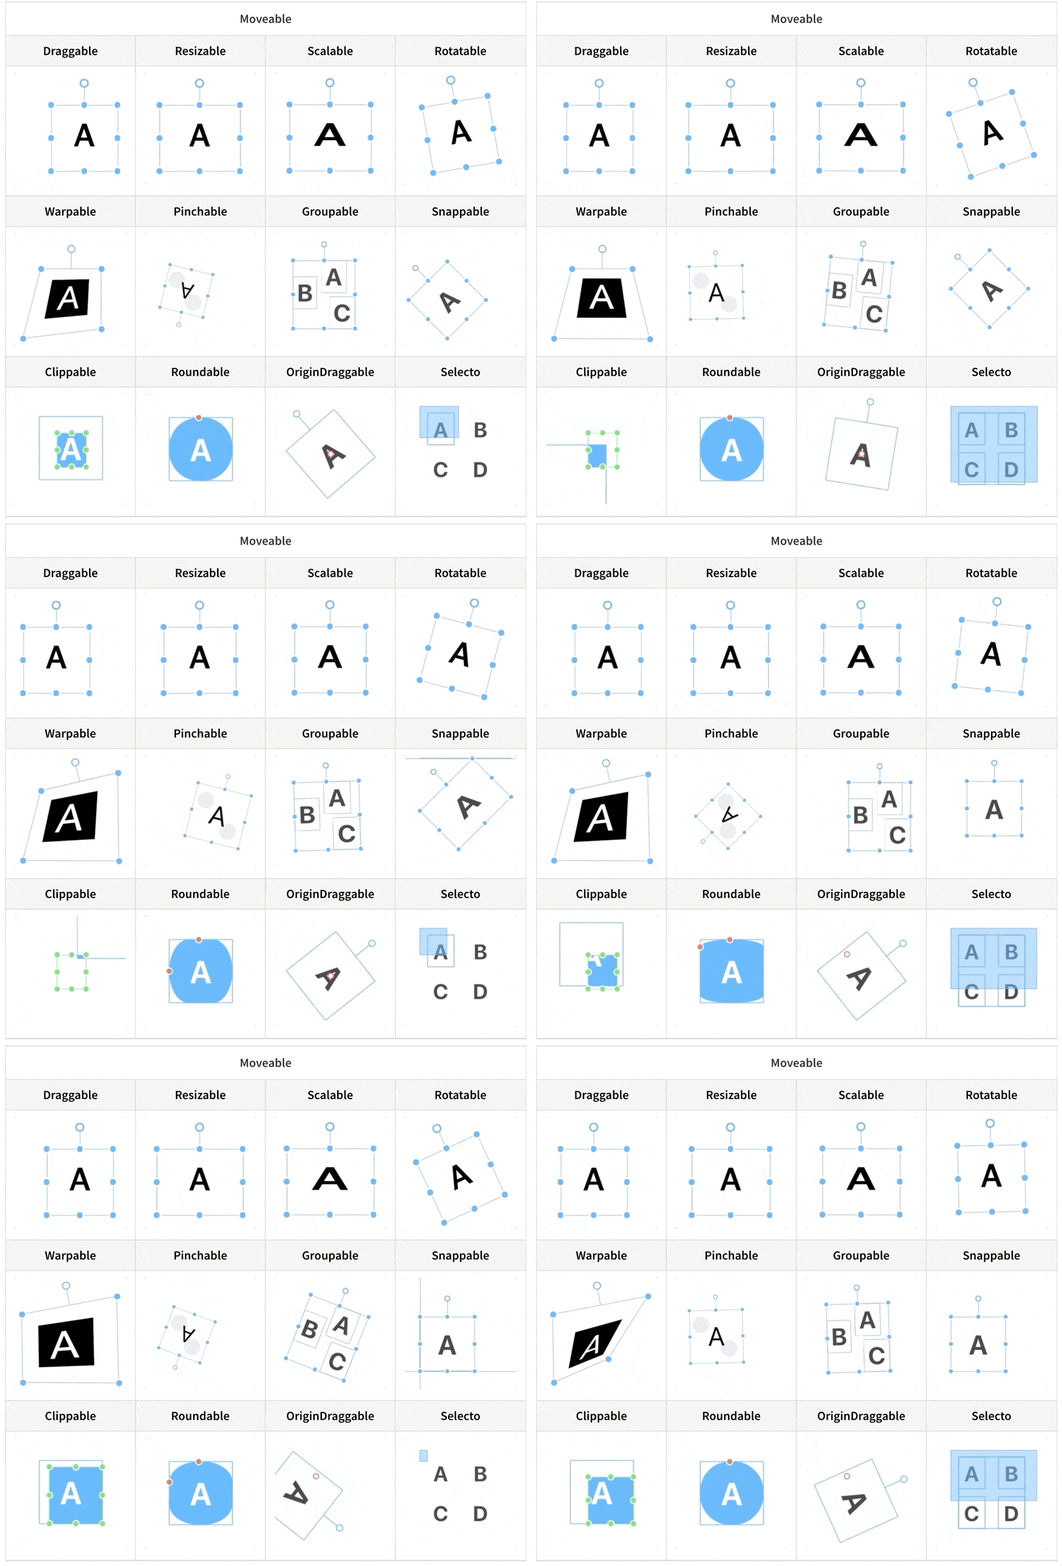
插件推荐: moveable - 可拖动,可调整,可伸缩,可旋转

插件推荐: moveable - 可拖动,可调整,可伸缩,可旋转

daybrush/moveable

<aside> 💡 友善提醒:建议结合源码一起阅读,效果更好(这个 DEMO 使用的是 Vue 技术栈)。

</aside>

1. 编辑器

先来看一下页面的整体结构。

https://p1-juejin.byteimg.com/tos-cn-i-k3u1fbpfcp/efe303bcc3a649d3a758eb94ccc38e0e~tplv-k3u1fbpfcp-watermark.image

这一节要讲的编辑器其实就是中间的画布。它的作用是:当从左边组件列表拖拽出一个组件放到画布中时,画布要把这个组件渲染出来。

这个编辑器的实现思路是:

  1. 用一个数组 componentData 维护编辑器中的数据。
  2. 把组件拖拽到画布中时,使用 push() 方法将新的组件数据添加到 componentData
  3. 编辑器使用 v-for 指令遍历 componentData,将每个组件逐个渲染到画布(也可以使用 JSX 语法结合 render() 方法代替)。

编辑器渲染的核心代码如下所示:

<component 
  v-for="item in componentData"
  :key="item.id"
  :is="item.component"
  :style="item.style"
  :propValue="item.propValue"
/>

每个组件数据大概是这样:

{
    component: 'v-text', // 组件名称,需要提前注册到 Vue
    label: '文字', // 左侧组件列表中显示的名字
    propValue: '文字', // 组件所使用的值
    icon: 'el-icon-edit', // 左侧组件列表中显示的名字
    animations: [], // 动画列表
    events: {}, // 事件列表
    style: { // 组件样式
        width: 200,
        height: 33,
        fontSize: 14,
        fontWeight: 500,
        lineHeight: '',
        letterSpacing: 0,
        textAlign: '',
        color: '',
    },
}

在遍历 componentData 组件数据时,主要靠 is 属性来识别出真正要渲染的是哪个组件。

例如要渲染的组件数据是 { component: 'v-text' },则 <component :is="item.component" /> 会被转换为 <v-text />。当然,你这个组件也要提前注册到 Vue 中。

如果你想了解更多 is 属性的资料,请查看官方文档

2. 自定义组件

原则上使用第三方组件也是可以的,但建议你最好封装一下。不管是第三方组件还是自定义组件,每个组件所需的属性可能都不一样,所以每个组件数据可以暴露出一个属性 propValue 用于传递值。

例如 a 组件只需要一个属性,你的 propValue 可以这样写:propValue: 'aaa'。如果需要多个属性,propValue 则可以是一个对象:

propValue: {
  a: 1,
  b: 'text'
}

在这个 DEMO 组件库中我定义了三个组件。

图片组件 Picture

<template>
    <div style="overflow: hidden">
        <img :src="propValue">
    </div>
</template>

<script>
export default {
    props: {
        propValue: {
            type: String,
            require: true,
        },
    },
}
</script>

按钮组件 VButton:

<template>
    <button class="v-button">{{ propValue }}</button>
</template>

<script>
export default {
    props: {
        propValue: {
            type: String,
            default: '',
        },
    },
}
</script>

文本组件 VText:

<template>
    <textarea 
        v-if="editMode == 'edit'"
        :value="propValue"
        class="text textarea"
        @input="handleInput"
        ref="v-text"
    ></textarea>
    <div v-else class="text disabled">
        <div v-for="(text, index) in propValue.split('\\n')" :key="index">{{ text }}</div>
    </div>
</template>

<script>
import { mapState } from 'vuex'

export default {
    props: {
        propValue: {
            type: String,
        },
        element: {
            type: Object,
        },
    },
    computed: mapState([
        'editMode',
    ]),
    methods: {
        handleInput(e) {
            this.$emit('input', this.element, e.target.value)
        },
    },
}
</script>

3. 拖拽

从组件列表到画布

一个元素如果要设为可拖拽,必须给它添加一个 draggable 属性。另外,在将组件列表中的组件拖拽到画布中,还有两个事件是起到关键作用的:

  1. dragstart 事件,在拖拽刚开始时触发。它主要用于将拖拽的组件信息传递给画布。
  2. drop 事件,在拖拽结束时触发。主要用于接收拖拽的组件信息。

先来看一下左侧组件列表的代码:

<div @dragstart="handleDragStart" class="component-list">
    <div v-for="(item, index) in componentList" :key="index" class="list" draggable :data-index="index">
        <i :class="item.icon"></i>
        <span>{{ item.label }}</span>
    </div>
</div>
handleDragStart(e) {
    e.dataTransfer.setData('index', e.target.dataset.index)
}

可以看到给列表中的每一个组件都设置了 draggable 属性。另外,在触发 dragstart 事件时,使用 dataTransfer.setData() 传输数据。再来看一下接收数据的代码:

<div class="content" @drop="handleDrop" @dragover="handleDragOver" @click="deselectCurComponent">
    <Editor />
</div>
handleDrop(e) {
    e.preventDefault()
    e.stopPropagation()
    const component = deepCopy(componentList[e.dataTransfer.getData('index')])
    this.$store.commit('addComponent', component)
}

触发 drop 事件时,使用 dataTransfer.getData() 接收传输过来的索引数据,然后根据索引找到对应的组件数据,再添加到画布,从而渲染组件。

https://p6-juejin.byteimg.com/tos-cn-i-k3u1fbpfcp/c9083ec57c6c4b51bb4af50f3818d2a0~tplv-k3u1fbpfcp-watermark.image

组件在画布中移动

首先需要将画布设为相对定位 position: relative,然后将每个组件设为绝对定位 position: absolute。除了这一点外,还要通过监听三个事件来进行移动:

  1. mousedown 事件,在组件上按下鼠标时,记录组件当前的位置,即 xy 坐标(为了方便讲解,这里使用的坐标轴,实际上 xy 对应的是 css 中的 lefttop
  2. mousemove 事件,每次鼠标移动时,都用当前最新的 xy 坐标减去最开始的 xy 坐标,从而计算出移动距离,再改变组件位置。
  3. mouseup 事件,鼠标抬起时结束移动。
handleMouseDown(e) {
    e.stopPropagation()
    this.$store.commit('setCurComponent', { component: this.element, zIndex: this.zIndex })

    const pos = { ...this.defaultStyle }
    const startY = e.clientY
    const startX = e.clientX
    // 如果直接修改属性,值的类型会变为字符串,所以要转为数值型
    const startTop = Number(pos.top)
    const startLeft = Number(pos.left)

    const move = (moveEvent) => {
        const currX = moveEvent.clientX
        const currY = moveEvent.clientY
        pos.top = currY - startY + startTop
        pos.left = currX - startX + startLeft
        // 修改当前组件样式
        this.$store.commit('setShapeStyle', pos)
    }

    const up = () => {
        document.removeEventListener('mousemove', move)
        document.removeEventListener('mouseup', up)
    }

    document.addEventListener('mousemove', move)
    document.addEventListener('mouseup', up)
}

https://p9-juejin.byteimg.com/tos-cn-i-k3u1fbpfcp/66fd70a8b2064e4f81c2e4be6c7d3328~tplv-k3u1fbpfcp-watermark.image

4. 删除组件、调整图层层级

改变图层层级

由于拖拽组件到画布中是有先后顺序的,所以可以按照数据顺序来分配图层层级。

例如画布新增了五个组件 abcde,那它们在画布数据中的顺序为 [a, b, c, d, e],图层层级和索引一一对应,即它们的 z-index 属性值是 01234(后来居上)。用代码表示如下:

<div v-for="(item, index) in componentData" :zIndex="index"></div>

如果不了解 z-index 属性的,请看一下 MDN 文档

理解了这一点之后,改变图层层级就很容易做到了。改变图层层级,即是改变组件数据在 componentData 数组中的顺序。例如有 [a, b, c] 三个组件,它们的图层层级从低到高顺序为 abc(索引越大,层级越高)。

如果要将 b 组件上移,只需将它和 c 调换顺序即可:

const temp = componentData[1]
componentData[1] = componentData[2]
componentData[2] = temp

同理,置顶置底也是一样,例如我要将 a 组件置顶,只需将 a 和最后一个组件调换顺序即可:

const temp = componentData[0]
componentData[0] = componentData[componentData.lenght - 1]
componentData[componentData.lenght - 1] = temp

https://p1-juejin.byteimg.com/tos-cn-i-k3u1fbpfcp/42ca7d8c64f840aeb60f3a5c4f3c7ba8~tplv-k3u1fbpfcp-watermark.image

删除组件

删除组件非常简单,一行代码搞定:componentData.splice(index, 1)

https://p6-juejin.byteimg.com/tos-cn-i-k3u1fbpfcp/53a43ff0c23a4287833006c3985533ba~tplv-k3u1fbpfcp-watermark.image

5. 放大缩小

细心的网友可能会发现,点击画布上的组件时,组件上会出现 8 个小圆点。这 8 个小圆点就是用来放大缩小用的。实现原理如下:

1. 在每个组件外面包一层 Shape 组件,Shape 组件里包含 8 个小圆点和一个 <slot> 插槽,用于放置组件。

<!--页面组件列表展示-->
<Shape v-for="(item, index) in componentData"
    :defaultStyle="item.style"
    :style="getShapeStyle(item.style, index)"
    :key="item.id"
    :active="item === curComponent"
    :element="item"
    :zIndex="index"
>
    <component
        class="component"
        :is="item.component"
        :style="getComponentStyle(item.style)"
        :propValue="item.propValue"
    />
</Shape>

Shape 组件内部结构:

<template>
    <div class="shape" :class="{ active: this.active }" @click="selectCurComponent" @mousedown="handleMouseDown"
    @contextmenu="handleContextMenu">
        <div
            class="shape-point"
            v-for="(item, index) in (active? pointList : [])"
            @mousedown="handleMouseDownOnPoint(item)"
            :key="index"
            :style="getPointStyle(item)">
        </div>
        <slot></slot>
    </div>
</template>

2. 点击组件时,将 8 个小圆点显示出来。

起作用的是这行代码 :active="item === curComponent"

3. 计算每个小圆点的位置。

先来看一下计算小圆点位置的代码:

const pointList = ['t', 'r', 'b', 'l', 'lt', 'rt', 'lb', 'rb']

getPointStyle(point) {
    const { width, height } = this.defaultStyle
    const hasT = /t/.test(point)
    const hasB = /b/.test(point)
    const hasL = /l/.test(point)
    const hasR = /r/.test(point)
    let newLeft = 0
    let newTop = 0

    // 四个角的点
    if (point.length === 2) {
        newLeft = hasL? 0 : width
        newTop = hasT? 0 : height
    } else {
        // 上下两点的点,宽度居中
        if (hasT || hasB) {
            newLeft = width / 2
            newTop = hasT? 0 : height
        }

        // 左右两边的点,高度居中
        if (hasL || hasR) {
            newLeft = hasL? 0 : width
            newTop = Math.floor(height / 2)
        }
    }

    const style = {
        marginLeft: hasR? '-4px' : '-3px',
        marginTop: '-3px',
        left: `${newLeft}px`,
        top: `${newTop}px`,
        cursor: point.split('').reverse().map(m => this.directionKey[m]).join('') + '-resize',
    }

    return style
}

计算小圆点的位置需要获取一些信息:

注意,小圆点也是绝对定位的,相对于 Shape 组件。所以有四个小圆点的位置很好确定:

  1. 左上角的小圆点,坐标 left: 0, top: 0
  2. 右上角的小圆点,坐标 left: width, top: 0
  3. 左下角的小圆点,坐标 left: 0, top: height
  4. 右下角的小圆点,坐标 left: width, top: height

https://p1-juejin.byteimg.com/tos-cn-i-k3u1fbpfcp/aa848fc6227849ad80b4ce21f0eaec59~tplv-k3u1fbpfcp-watermark.image

另外的四个小圆点需要通过计算间接算出来。例如左边中间的小圆点,计算公式为 left: 0, top: height / 2,其他小圆点同理。

https://p9-juejin.byteimg.com/tos-cn-i-k3u1fbpfcp/0cf2bbe521f343cda67a542263e61d57~tplv-k3u1fbpfcp-watermark.image

4. 点击小圆点时,可以进行放大缩小操作。

handleMouseDownOnPoint(point) {
    const downEvent = window.event
    downEvent.stopPropagation()
    downEvent.preventDefault()

    const pos = { ...this.defaultStyle }
    const height = Number(pos.height)
    const width = Number(pos.width)
    const top = Number(pos.top)
    const left = Number(pos.left)
    const startX = downEvent.clientX
    const startY = downEvent.clientY

    // 是否需要保存快照
    let needSave = false
    const move = (moveEvent) => {
        needSave = true
        const currX = moveEvent.clientX
        const currY = moveEvent.clientY
        const disY = currY - startY
        const disX = currX - startX
        const hasT = /t/.test(point)
        const hasB = /b/.test(point)
        const hasL = /l/.test(point)
        const hasR = /r/.test(point)
        const newHeight = height + (hasT? -disY : hasB? disY : 0)
        const newWidth = width + (hasL? -disX : hasR? disX : 0)
        pos.height = newHeight > 0? newHeight : 0
        pos.width = newWidth > 0? newWidth : 0
        pos.left = left + (hasL? disX : 0)
        pos.top = top + (hasT? disY : 0)
        this.$store.commit('setShapeStyle', pos)
    }

    const up = () => {
        document.removeEventListener('mousemove', move)
        document.removeEventListener('mouseup', up)
        needSave && this.$store.commit('recordSnapshot')
    }

    document.addEventListener('mousemove', move)
    document.addEventListener('mouseup', up)
}

它的原理是这样的:

  1. 点击小圆点时,记录点击的坐标 xy。
  2. 假设我们现在向下拖动,那么 y 坐标就会增大。
  3. 用新的 y 坐标减去原来的 y 坐标,就可以知道在纵轴方向的移动距离是多少。
  4. 最后再将移动距离加上原来组件的高度,就可以得出新的组件高度。
  5. 如果是正数,说明是往下拉,组件的高度在增加。如果是负数,说明是往上拉,组件的高度在减少。

https://p3-juejin.byteimg.com/tos-cn-i-k3u1fbpfcp/0d92a3d0097943df97d0ebfe0285dd1f~tplv-k3u1fbpfcp-watermark.image

6. 撤消、重做

撤销重做的实现原理其实挺简单的,先看一下代码:

snapshotData: [], // 编辑器快照数据
snapshotIndex: -1, // 快照索引
        
undo(state) {
    if (state.snapshotIndex >= 0) {
        state.snapshotIndex--
        store.commit('setComponentData', deepCopy(state.snapshotData[state.snapshotIndex]))
    }
},

redo(state) {
    if (state.snapshotIndex < state.snapshotData.length - 1) {
        state.snapshotIndex++
        store.commit('setComponentData', deepCopy(state.snapshotData[state.snapshotIndex]))
    }
},

setComponentData(state, componentData = []) {
    Vue.set(state, 'componentData', componentData)
},

recordSnapshot(state) {
    // 添加新的快照
    state.snapshotData[++state.snapshotIndex] = deepCopy(state.componentData)
    // 在 undo 过程中,添加新的快照时,要将它后面的快照清理掉
    if (state.snapshotIndex < state.snapshotData.length - 1) {
        state.snapshotData = state.snapshotData.slice(0, state.snapshotIndex + 1)
    }
},

用一个数组来保存编辑器的快照数据。保存快照就是不停地执行 push() 操作,将当前的编辑器数据推入 snapshotData 数组,并增加快照索引 snapshotIndex。目前以下几个动作会触发保存快照操作: